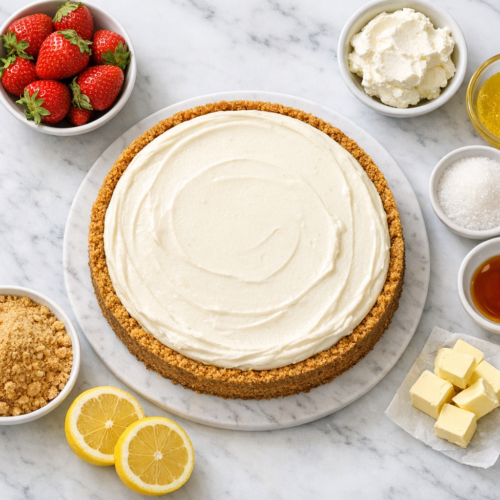
No Bake Cheesecake Without Oven
This no bake cheesecake offers a creamy texture and refreshing flavor without the need for an oven. The smooth filling and buttery crust make it a pleasant dessert.
Ingredients
- 1 1/2 cups graham cracker crumbs finely crushed
- 1/4 cup sugar
- 1/2 cup unsalted butter melted
- 2 cups cream cheese softened
- 1 cup heavy cream cold
- 1/2 cup powdered sugar
- 1 tbsp lemon zest freshly grated
- 1 tsp vanilla extract
- 1 tbsp gelatin powder unflavored
- 1/4 cup water warm
Instructions
- In a medium bowl, combine graham cracker crumbs, sugar, and melted butter. Mix until the crumbs are evenly coated and resemble wet sand. Press the mixture firmly into the bottom of a springform pan, using a flat-bottomed glass to ensure an even layer. Chill in the refrigerator while preparing the filling.
- In a small bowl, sprinkle gelatin over warm water and let it sit for 5 minutes to bloom. Stir until completely dissolved, ensuring no lumps remain. This step is crucial for achieving a smooth texture in the cheesecake filling.
- In a large mixing bowl, beat softened cream cheese with an electric mixer on medium speed until smooth and creamy, about 2 minutes. Gradually add powdered sugar, beating until fully incorporated and the mixture is light and fluffy.
- Add the dissolved gelatin to the cream cheese mixture, beating on low speed until well combined. Ensure the gelatin is evenly distributed to avoid any uneven setting in the cheesecake.
- In a separate bowl, whip heavy cream to soft peaks using an electric mixer. The cream should hold its shape but still be soft. Fold the whipped cream into the cream cheese mixture gently, using a spatula to maintain the airy texture.
- Gently fold in the lemon zest and vanilla extract, ensuring they are evenly distributed throughout the mixture. The lemon zest imparts a bright aroma and a hint of citrus, enhancing the creamy texture. Be careful not to overmix, as this could affect the smoothness of the cheesecake filling.
- Pour the filling over the chilled crust in the springform pan. Smooth the top with a spatula, ensuring an even surface. Tap the pan gently on the counter to release any air bubbles that may have formed.
- Cover the pan with plastic wrap and refrigerate for at least 4 hours, or until the cheesecake is firm to the touch. This chilling time allows the flavors to meld and the filling to set properly.
- Before serving, run a knife around the edge of the pan to loosen the cheesecake. Release the springform pan carefully, ensuring the cheesecake remains intact. Transfer to a serving plate if desired.
- Before slicing and serving, sprinkle additional lemon zest over the cheesecake for a bright, citrusy aroma. The zest adds a pop of color and a refreshing scent, enhancing the dessert's presentation. For an extra touch, consider arranging fresh berries around the edges, creating a visually appealing contrast with the creamy cheesecake.
Notes
Ensure the gelatin is fully dissolved to avoid a grainy texture in the cheesecake. Chilling the cheesecake for at least 4 hours is essential for proper setting and flavor development.