
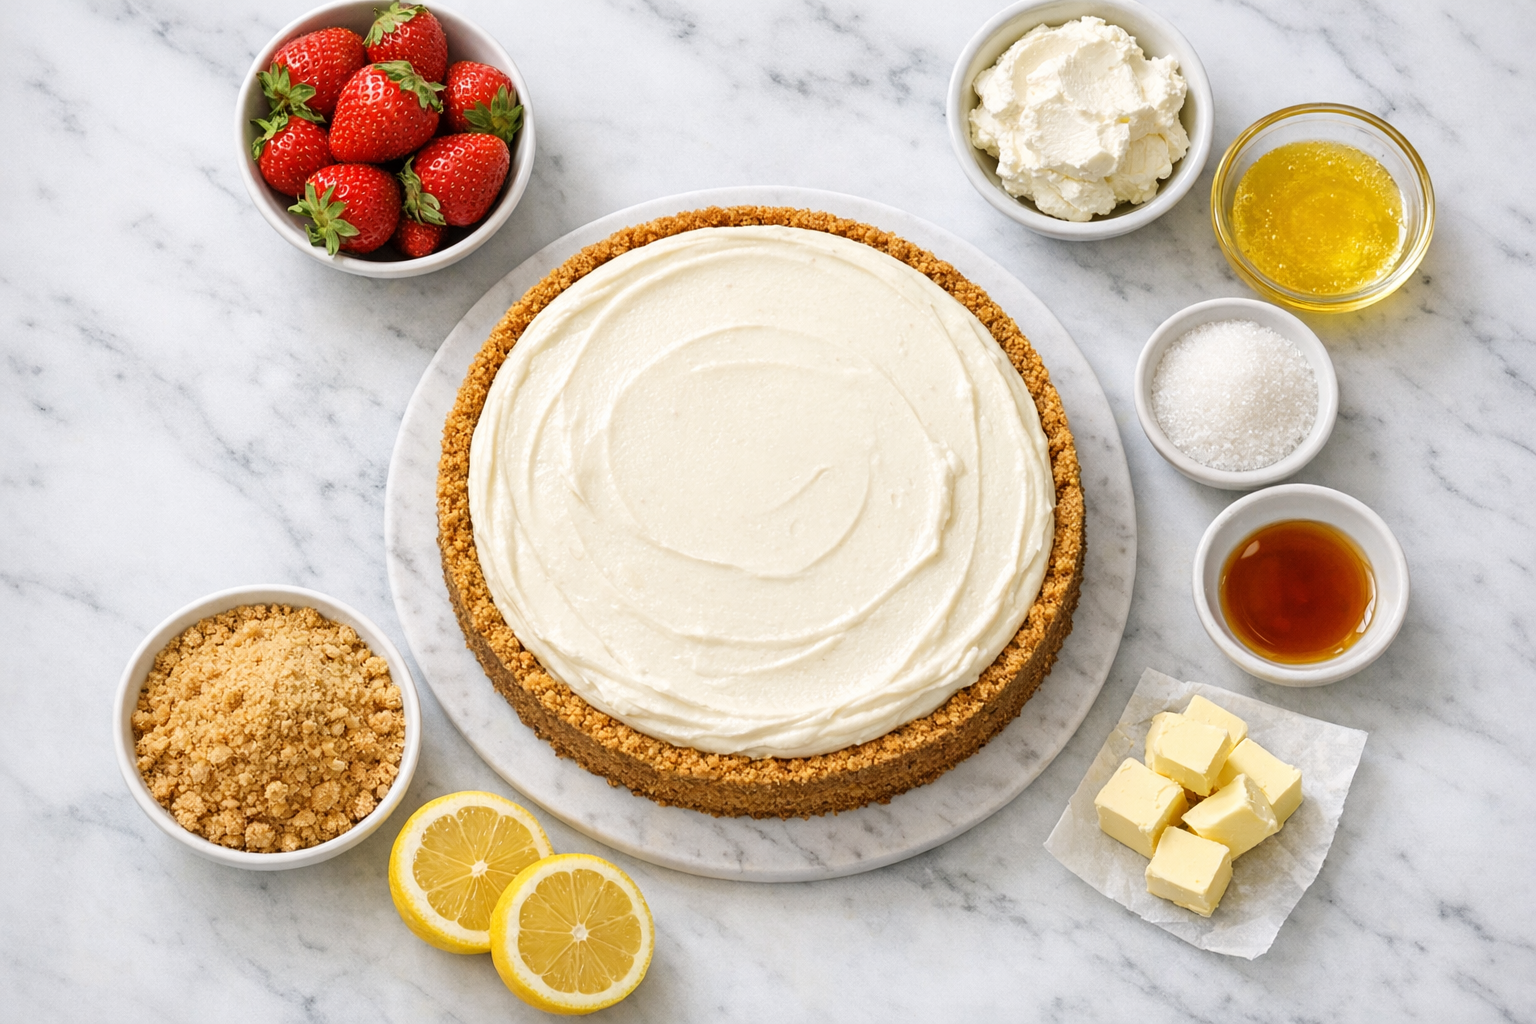
Creating a no bake cheesecake without an oven offers a pleasant dessert experience through its creamy texture and refreshing flavor. This recipe eliminates the need for baking, relying on the chill of the refrigerator to set the cheesecake. The result is a smooth, rich filling that pairs perfectly with a buttery graham cracker crust. The aroma of vanilla and lemon zest enhances the overall sensory experience, making it a perfect treat for any occasion.
Why This Recipe Works
- Gelatin is essential for achieving a firm set in this no-bake cheesecake, providing a smooth consistency that maintains its form when cut into slices.
- The combination of cream cheese and heavy cream creates a rich, creamy filling that balances perfectly with the crunchy crust.
- Incorporating lemon zest introduces a bright citrus element that complements the creamy texture, balancing the sweetness and adding depth to the overall taste of the cheesecake.
- Chilling the cheesecake for at least 4 hours allows the flavors to meld and the texture to firm up, ensuring a satisfying dessert.
Recipe at a Glance
| Detail | Value |
|---|---|
| Prep time | 20 min |
| Cook time | No cooking |
| Total time | 4 h 20 min |
| Servings | 8 |
| Calories (per serving) | 350 kcal |
| Protein (per serving) | 5 g |
| Carbohydrates (per serving) | 28 g |
| Fat (per serving) | 25 g |
| Fiber (per serving) | 1 g |
| Estimated cost per serving | ~$1.75 |
Nutrition and cost are per-serving estimates calculated from the ingredient quantities in the recipe card below; cost uses average US supermarket prices.
No Bake Cheesecake Without Oven
Ingredients
- 1 1/2 cups graham cracker crumbs finely crushed
- 1/4 cup sugar
- 1/2 cup unsalted butter melted
- 2 cups cream cheese softened
- 1 cup heavy cream cold
- 1/2 cup powdered sugar
- 1 tbsp lemon zest freshly grated
- 1 tsp vanilla extract
- 1 tbsp gelatin powder unflavored
- 1/4 cup water warm
Instructions
- In a medium bowl, combine graham cracker crumbs, sugar, and melted butter. Mix until the crumbs are evenly coated and resemble wet sand. Press the mixture firmly into the bottom of a springform pan, using a flat-bottomed glass to ensure an even layer. Chill in the refrigerator while preparing the filling.
- In a small bowl, sprinkle gelatin over warm water and let it sit for 5 minutes to bloom. Stir until completely dissolved, ensuring no lumps remain. This step is crucial for achieving a smooth texture in the cheesecake filling.
- In a large mixing bowl, beat softened cream cheese with an electric mixer on medium speed until smooth and creamy, about 2 minutes. Gradually add powdered sugar, beating until fully incorporated and the mixture is light and fluffy.
- Add the dissolved gelatin to the cream cheese mixture, beating on low speed until well combined. Ensure the gelatin is evenly distributed to avoid any uneven setting in the cheesecake.
- In a separate bowl, whip heavy cream to soft peaks using an electric mixer. The cream should hold its shape but still be soft. Fold the whipped cream into the cream cheese mixture gently, using a spatula to maintain the airy texture.
- Gently fold in the lemon zest and vanilla extract, ensuring they are evenly distributed throughout the mixture. The lemon zest imparts a bright aroma and a hint of citrus, enhancing the creamy texture. Be careful not to overmix, as this could affect the smoothness of the cheesecake filling.
- Pour the filling over the chilled crust in the springform pan. Smooth the top with a spatula, ensuring an even surface. Tap the pan gently on the counter to release any air bubbles that may have formed.
- Cover the pan with plastic wrap and refrigerate for at least 4 hours, or until the cheesecake is firm to the touch. This chilling time allows the flavors to meld and the filling to set properly.
- Before serving, run a knife around the edge of the pan to loosen the cheesecake. Release the springform pan carefully, ensuring the cheesecake remains intact. Transfer to a serving plate if desired.
- Before slicing and serving, sprinkle additional lemon zest over the cheesecake for a bright, citrusy aroma. The zest adds a pop of color and a refreshing scent, enhancing the dessert's presentation. For an extra touch, consider arranging fresh berries around the edges, creating a visually appealing contrast with the creamy cheesecake.
Notes
Pro Tips
- Allow the cream cheese to reach room temperature before mixing. This step ensures it blends smoothly, preventing lumps and resulting in a uniform texture. Cold cream cheese can lead to a lumpy mixture, affecting the final consistency.
- Opt for a springform pan to simplify cheesecake removal. This design allows the sides to release, minimizing the risk of breaking the cheesecake’s structure when moving it to a serving dish, maintaining its intended appearance.
- To achieve a smooth texture in your cheesecake, fully hydrate the gelatin by sprinkling it over cold water first. Then, dissolve it completely in warm water. This prevents any graininess, ensuring a creamy consistency throughout the dessert.
- To achieve a more compact crust, firmly press the graham cracker mixture into the pan using the back of a spoon or a flat-bottomed glass. This ensures the crust holds together well when slicing and serving the cheesecake.
- If the filling seems too soft after mixing, refrigerate it for 10-15 minutes before spreading it over the crust to help it firm up slightly.
Variations
- For a budget-friendly version, replace the cream cheese with Neufchâtel cheese, which is often less expensive and slightly lower in fat.
- For a vegan version, substitute coconut cream for dairy cream, choose a plant-based cream cheese, and swap gelatin with agar-agar to achieve the desired texture.
- Incorporate fresh seasonal berries like strawberries or blueberries into the filling for a fruity twist that complements the creamy base.
- For an Italian-inspired variation, add a touch of espresso powder to the filling and top with a dusting of cocoa powder for a tiramisu flavor.
Storage
After preparing the no bake cheesecake, promptly place it in a shallow airtight container and refrigerate within two hours to ensure freshness and safety. It can be stored in the refrigerator for up to five days. If you wish to keep it longer, freezing is an option. The cheesecake can be frozen for up to two months, though be aware that freezing may slightly change its texture, making it less smooth when thawed. To serve, transfer the cheesecake to the refrigerator and allow it to thaw overnight.
How to Reheat
To prepare the cheesecake for serving after freezing, transfer it to the refrigerator and allow it to thaw overnight. For a slightly softer texture, let it rest at room temperature for 10-15 minutes before slicing. Avoid using a microwave or any direct heat source, as this can cause the filling to lose its structure and become overly soft.
Related Recipes
- How to Make Iced Coffee Without a Machine
- Creamy Hummus Without Tahini
- Tofu Scramble Without Nutritional Yeast
FAQ
Can I use a different crust for this cheesecake?
Yes, you can substitute the graham cracker crust with a variety of options. Try using crushed digestive biscuits, Oreo cookies, or even a nut-based crust for a different texture and flavor. Ensure the crust is well-pressed into the pan to hold the filling properly.
How can I prevent the cheesecake from being too soft?
To prevent a soft cheesecake, make sure to use the correct amount of gelatin and allow it to fully dissolve in warm water. Also, chill the cheesecake for at least 4 hours, or overnight, to ensure it sets properly. If the filling is too soft, refrigerate it before spreading over the crust.
Is it possible to make this cheesecake gluten-free?
Yes, you can make this cheesecake gluten-free by substituting regular graham crackers with gluten-free ones or using gluten-free cookies for the crust. Additionally, verify that all other ingredients, including cream cheese and gelatin, are labeled gluten-free to prevent cross-contamination. This ensures the dessert remains suitable for those with gluten sensitivities. Always check packaging for gluten-free certification to maintain the quality and safety of your cheesecake.
What can I use instead of gelatin?
Agar-agar is a great alternative to gelatin for setting the cheesecake. It is plant-based and works similarly to gelatin. Use the same amount as you would gelatin, but dissolve it in boiling water before adding it to the filling to ensure it activates properly.
How do I know when the cheesecake is ready to serve?
The cheesecake is ready to serve when it is firm to the touch and holds its shape when sliced. After chilling for at least 4 hours, gently press the center with a finger; it should feel set and not jiggle. If it still feels soft, chill longer.
Chilling is crucial for a no bake cheesecake without an oven. Allowing ample time for the cheesecake to set ensures a firm texture and well-blended flavors, resulting in a pleasant dessert experience. Enjoy the creamy, rich filling with every bite.